Phases of a Mobile App Attack, Part 2: The Attacker’s POV
In my last blog, I described the four main phases a mobile application man-at-the-end attack goes through as it unfolds. Now, let’s break down what the attack process might look like using Guardsquare Chat (or GCE), an open-source application, as an example.
GCE allows users to send chat messages to each other. Some chat messages can self-destruct. Such self-destructing messages will display on the recipient’s screen for five seconds and then disappear from the chat history.
An attacker could disable the self-destruct feature so the messages are not destroyed on the recipient side. In the real world, similar modifications may circumvent business rules (like in our case), allow attackers to eavesdrop on users, fake transactions with malicious intent, and more.
Let us take the attacker’s perspective for once, and perform all stages of the attack one-by-one:
- Reconnaissance, the phase where a malicious actor studies the application’s behavior and links it to the relevant code.
- Execution, where the malicious actor implements the attack locally.
- Distribution, where the malicious actor rolls out the attack globally.
- Automation, where the malicious actor takes steps to replicate the attack on subsequent application versions automatically.
Reconnaissance
| Phase | Reconnaissance |
| Goal | Identify the application logic that will be attacked, and locate the application code responsible for that logic. |
| Tools and Methods |
|
We will start with the reconnaissance phase. Let’s inspect the application to find as many clues as possible to locate the places of interest in the code later.
Here’s a sample chat thread in the GCE project:
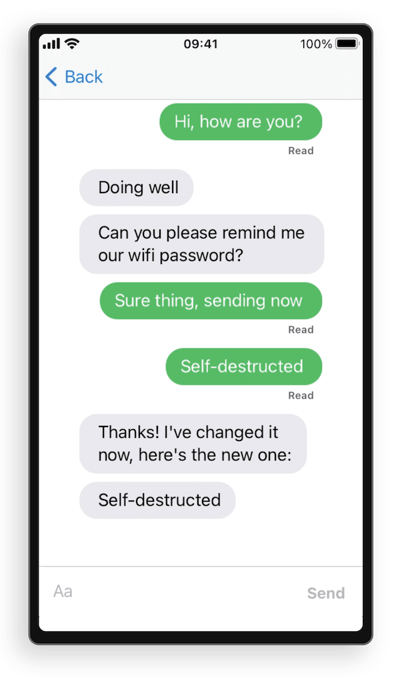
As an attacker, we can observe two important details:
- A self-destructing message has to be prepended with the word “secret,” for example, a message “Secret: my PIN-code is 123456” will self-destruct.
- When the message is destroyed, it is not removed from the list completely but leaves a trail to indicate there was a real message at some point. Instead of deletion, the text of the message is changed to “Self-destructed.”
The two observations above are our “anchors,” which we will use to locate the routine that sends read receipts in the code faster.
Now armed with our reconnaissance information, let us start with reverse engineering. Since the code of our example GCE application is not obfuscated in any way, it will not be a difficult exercise.
The first step would be to dump the application from the device memory. There are many tools to help you in the process, such as Clutch or fouldecrypt.
After the application is dumped, we will start with locating the “Self-destructed” string. For this we open the application in a disassembly tool and look for the “Self-destructed” string.
In this blog we will use Ghidra for all our static analysis needs.
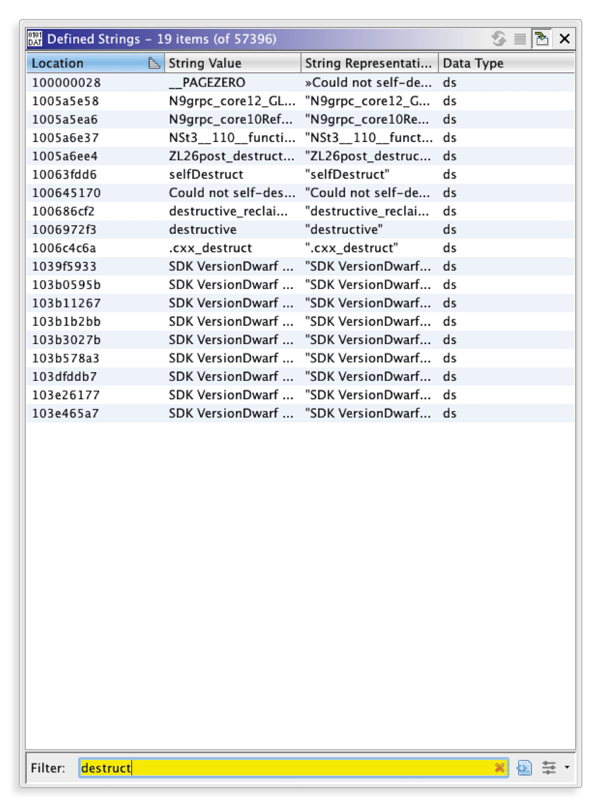
Searching for strings is the most common way you can locate the text of interest and search for the code that references that text.
However, in our case, the string is not found immediately. This happens because of the way Swift treats short string literals. For the purpose of efficiency, small string constants would be embedded directly into the assembly code.
Finding this code would be a bit more complicated, but not complicated enough to stop you! First, let’s convert the string we search to Hex — for this we will use Cyberchef. Swift will load literals in blocks of two bytes, where the bytes will have a reverse order. We can construct a perfect recipe in Cyberchef to do the conversion for us.
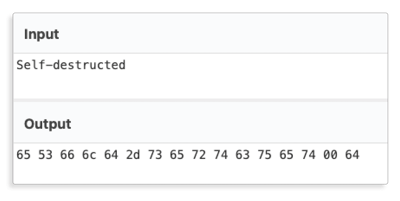
Let’s use Ghidra search to find the first two bytes in an assembly instruction operand.

We will find three places in the code, a close inspection would reveal the place we’re looking for.
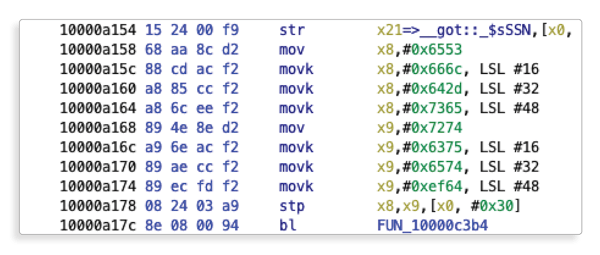
Recognize the sequence of bytes?0x6553 0x666c 0x642d… correspond to our hex conversion of the “Self-destructed” string.
Scrolling up reveals a functionFUN_100009fc0that works with this string. For the sake of this exercise, let’s consider the recon phase complete at this point. Together with the attacker we will play with this function at runtime and see what happens when we change its behavior.
Attack execution
| Phase | Attack execution |
| Goal | Modify the application to achieve the intended result and make the modification work on the attacker’s device. |
| Tools and Methods |
|
Now that we have determined the function where the self-destruct logic takes place, the next step is to disable it to make the self-destructing messages persistent.
At this stage we will not bother with making the attack permanent. Instead, our focus will be to make the attack work on our device.
To be able to iterate on the modification faster, we will modify the application in the memory of the phone. For this purpose, reverse engineers could use a jailbroken device together with a debugging or code instrumentation tool such as lldb.
In this example, we will be using Frida. Frida is a dynamic code instrumentation toolkit, i.e. a tool that enables you to modify the code of or add your own code to existing third-party applications.
We will start with attaching Frida:
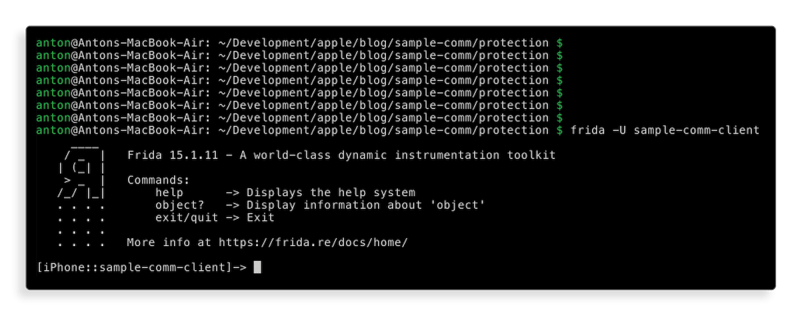
Let’s do some simple dynamic analysis first. We have determined a function that supposedly has to do with the message self-destruction. Let’s verify if that is indeed the case:

Note that0x9fc0offset is taken from Ghidra.
Sending a self-destruct message to yourself from another account results in our interceptor printing the message:

Now we know that this function is indeed called during the message self-destruct. Let’s check a hypothesis that this function is responsible for the messages’ self-destruct logic. The following step is to modify the app behavior such that the function does not have any effect.
For this we will use Frida code patching utility to cause the function to immediately return:

Sending another self-destruct message results in it staying permanently in the chat, which confirms our prior hypothesis:
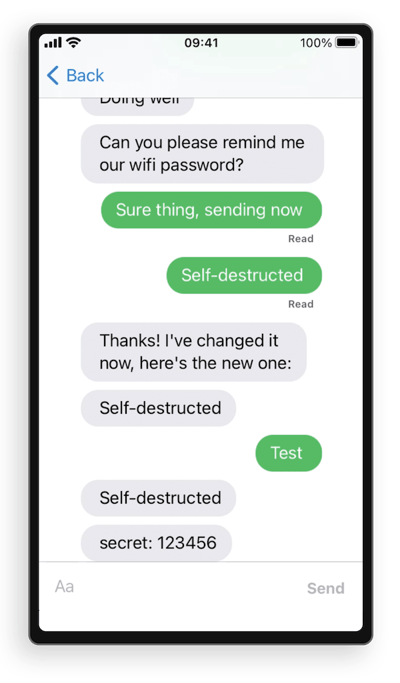
Congratulations! This concludes the execution phase, but our attack scenario is not over yet.
Distribution
| Phase | Distribution |
| Goal | Make the application modification work on other users’ devices. |
| Tools and Methods |
|
The attack works on our device — great! Now the next question is how to make it available for a wider audience. We have several ways of doing so at our disposal: such as making a tweak or distributing a repackaged version of the app.
The latter is more interesting, especially given the recently discovered vulnerabilities in Apple operating systems.
Again, let’s try to step into the attacker's shoes and recreate the attack distribution steps ourselves. This time we will use Ghidra, a tool that makes on-disk binary modifications easy.
To get started, let’s start with importing the binary:
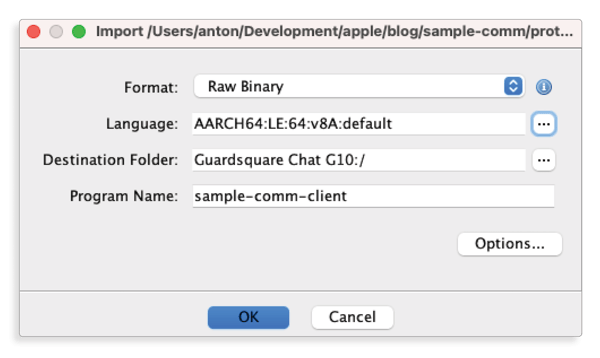
In the first phase we have found (and in the second phase, confirmed) the address of the function responsible for the message self-destruct logic:0x9FC0. The next step is to go to0x9FC0address and patch the instruction:
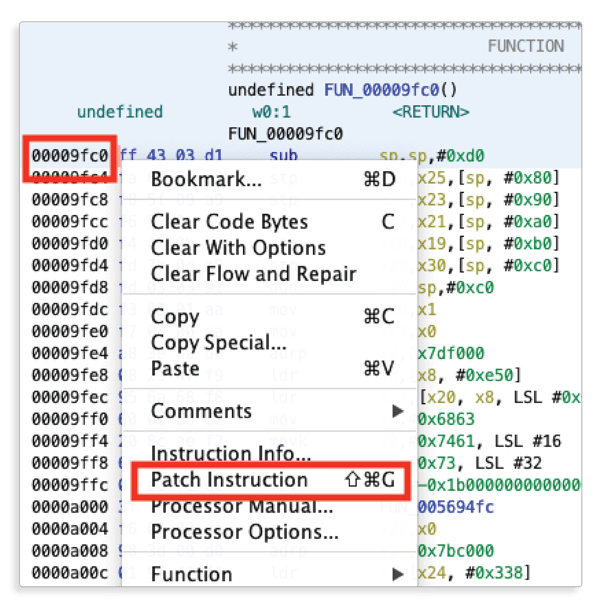
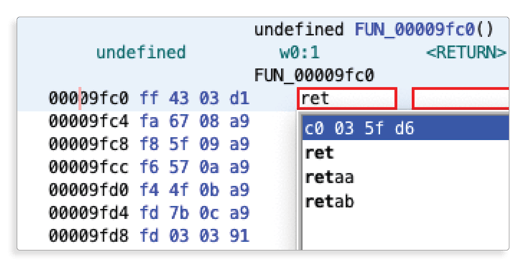
This patch makes the changes that we have done during the second phase permanent.
After the patch the function will look like this:

Save the resulting binary to make the patch permanent and reusable.
To distribute the resulting IPA through Trollstore it is enough to resign it and put it online.
Automation
| Phase | Attack Automation |
| Goal | Perform the required application modifications automatically on subsequent versions of the same application. |
| Tools and Methods | Search and replace. E.g. grep + sed + xxd. |
After we have uploaded the modified application and made it available to the public, the story is not yet over. New versions of the application may come out, and the old versions may stop working. To keep up with the version changes, we would have to repeat the above process for every version released.
The final phase is to automate these changes so that you don’t have to repeat them for every version of the application.
Automated patching techniques may vary depending on the nature of the information being patched. In this example, let’s use the simplest possible way to patch — find the relevant instruction code bytes in the application and replace them with the new instruction code.
We are patching the first instruction in the function:
FF 43 03 D1 = sub sp, sp, #0xd0
With:
C0 03 5F D6 = ret
However, if we implement the patch to just switch this four-byte sequence, it might target extra places in the code and render the application unusable. To mitigate this problem, let’s take some more context from the function we intend to modify.
Before:
FF 43 03 D1 FA 67 08 A9 F8 5F 09 A9 F6 57 0A A9 F4 4F 0B A9 FD 7B 0C A9 FD 03 03 91
After:
C0 03 5F D6 FA 67 08 A9 F8 5F 09 A9 F6 57 0A A9 F4 4F 0B A9 FD 7B 0C A9 FD 03 03 91
This modification relies on the assumption that the function byte signature will not change very often, thus saving us time on finding and patching it every time.
The most trivial binary patching automation can be achieved with hexdump | sed | xxd. In the real-world scenario, a better choice would be a custom-developed patching utility that combines automated patching, assumptions checking, and error reporting.
Conclusion
The steps outlined in part one of this series provide a practical framework that shows the work required to implement an attack.
We demonstrated that the effort to execute all four steps on a simple unprotected application is very low, and the professional knowledge and skills required to go through the process are few. In a real-world scenario, an attack can take several hours to many months depending on the application complexity and the security solutions implemented.
Protecting your application will raise the bar for the attackers and significantly increase the skills and effort required to reverse engineer.


